-Blender 2.64 or newer,.
-Photoshop 3D.
-Cloudparty Avatar all rigged and enabled for Blender 2.64: get release from here ( thanks and credits to Ashasekayi Ra ) .
2- Open Cloud Party avatar in Bender and go to Edit Mode.
3- Go selecting and deleting all faces you would not need for the shirt.
4- Scale it a little bigger...1.03.
5- File > Export as Collada .dae.
Make sure to check options in the left "Selection Only" and "Include Armatures".
6- Open the exported file in Photoshop 3D.
7-Double click on "Body-material - Default Texture" on the Layers tab.
This will open a new window for the texture layer. Fill it with color.
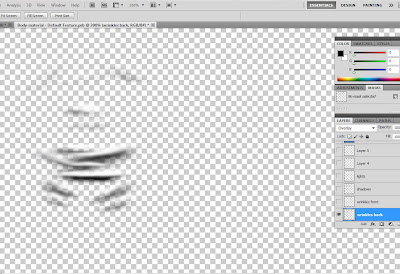
8- Create new layers above this for wrinkles.
Switch to .dae file tab and start to paint wrinkles right over your 3D model.
9-Do double click on "Body-material - Default Texture" any time you want to see how it is coming out your 3D painting, and do work over this 2d texture applying blur, eraser, fusion modes , opacity, and any other tools as you would do to any other 2D work.
Add new layers for making shadows, lights, texts or even pics.

11- When finished merge all layers in a single one and "save it for web" as a 512x512 png file.
Name it "texture-shirt".
12-Go to Cloud Party, click on the cell phone and build button.
Click on Library tab > Create
Click on Upload tab > "+" sign and look for the collada file from Blender and the texture file from Photoshop in your directory.
Upload and close.
13- Once both files are in your palette we are about to create an object, a custome in this case.
Objects are meshes made from Materials and Materials are made from different kinds of textures:
Do click on Create tab > Material.
Click on the "Diffuse" box and select your shirt-texture.
OK.
14- Do click on Create tab > Costume.
Click on the "Slot" box and select "Top".
Click on the "Mesh" box and select your collada file.
Click on Materials > "Body-material" box and select the material you created from your texture.
OK.
Close Building window.
15-Click Cell phone again and "Outfits" button > Tops > Select your new top.
Disclaimer: Just sharing as I go learning in the by so you may encounter some inaccuracies in my tutos. Corrections are welcome.
 g
g


No hay comentarios:
Publicar un comentario